Autumn Leaves Penny Rug Tutorial
For this penny rug, I wanted to capture the rich colors of newly fallen autumn leaves. Instead of the smooth, commercial wool felt pieces that are often used for penny rugs; I recycled old felted wool blankets for this project. I love the thick, fuzzy textures of wool blankets. Also, using wool from blankets allowed me to make the base of the penny rug as large as I wanted.
This tutorial focuses more on the designing and coloring of the penny rug: the basics of stitching and finishing are covered by other tutorials.
What you will need :
White or cream color wool blanket. You can find old wool blankets at thrift shops, Goodwill, or Ebay
I use AmeriColor Food Coloring, but you could just as easily use any brand you find in the grocery store,
Microwave.
Large container for soaking your wool.
Microwave-safe plate
Plastic wrap
Vinegar
Free printable autumn leaves pattern from our sister website ChildrensArt.Info
Scissors for cutting felted fabric
Old, yet clean, toothbrush
Paper for base pattern
Needle with large eye for threading, such as a chenille hand needle
Embroidery floss in your choice of colors
Quilters' pins, if desired
Dyeing the Wool in Autumn Colors
If your blanket isn't already felted, toss it into your machine washer with some detergent. Then dry it in your dryer.
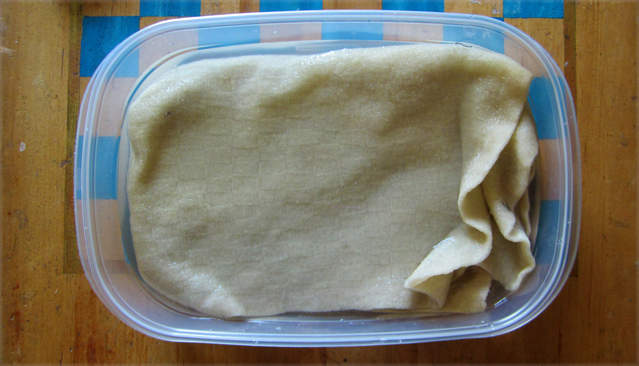
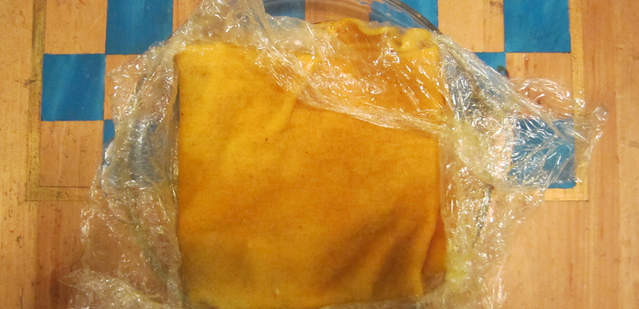
Cut out a large section of the wool blanket (I used a piece approximately 2' x 3'). Let it soak for an hour in water with a good splash of vinegar.
At this point, drain the water and squeeze out some of the excess. You don't want the fabric to be drippy, nor do you want it to be too dry.
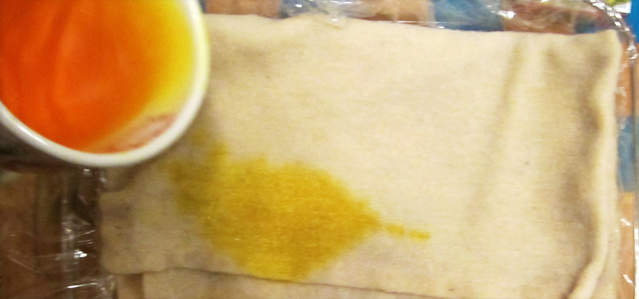
Starting with yellow, mix food color with water and splash it over the wool. In real autumn leaves, the concentration of color varies from area to area. So don't try for flat color: try for varied concentrations.
Follow the same procedure with orange and red. Try to keep a light touch, as the colors will run into each other.
Wrap the wet wool felt in plastic wrap and place on a microwave-safe plate. Microwave at high for around 2 minutes.
The wool will be dangerously hot. Use tongs to open up the plastic wrap if you can't wait to see how the food coloring took. Personally, I took the opportunity to clean the bathroom while the felt cooled.
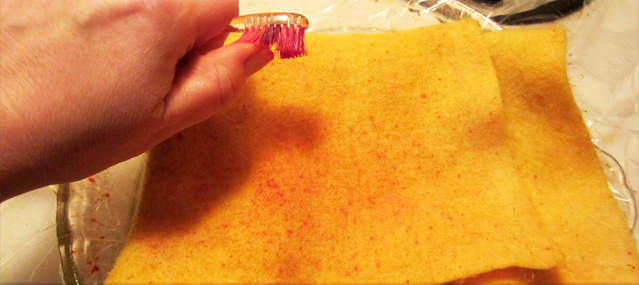
I thought the colors had blended a bit too much, so I decided to add more color.
Using an old toothbrush, I splattered red food coloring over the still damp wool. If your wool has dried out at all from the microwaving, you can rewet it so that the red splatters spread and blend nicely.
. I also experimented with a tiny bit of green that showed on a few of the final leaves.
I wrapped the felt in plastic wrap and microwaved it a second time.
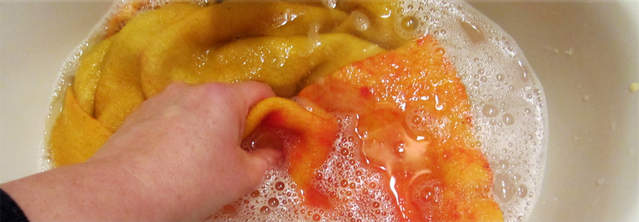
After the wool cooled again, I rinsed it with a little lavender soap. The water stayed clear, which meant the colors had set completely.
Let the felt dry completely. It's okay to toss it into the dryer if you are in a hurry!
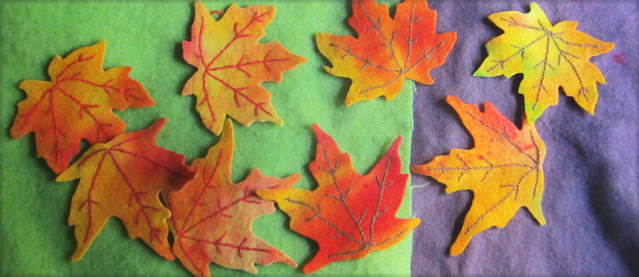
Felted Wool Maple Leaves
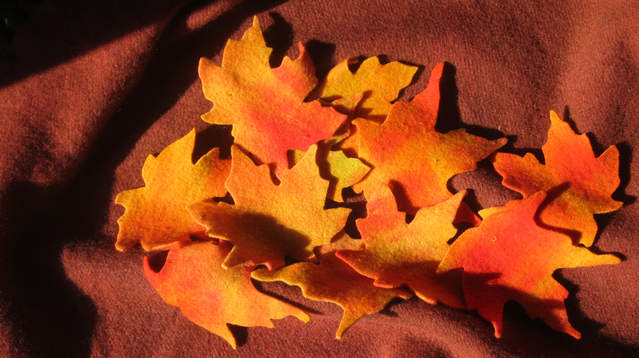
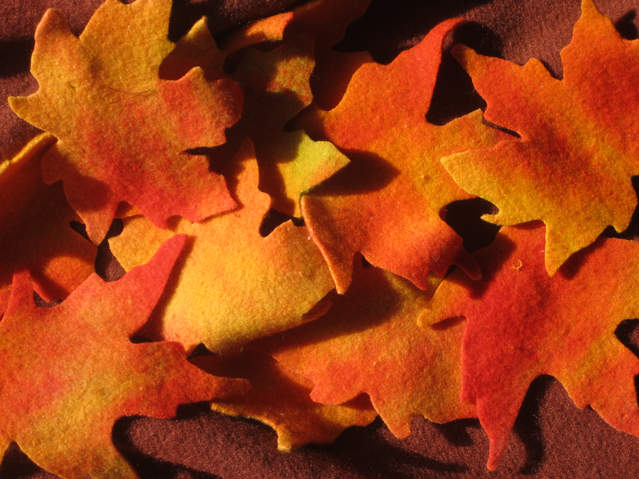
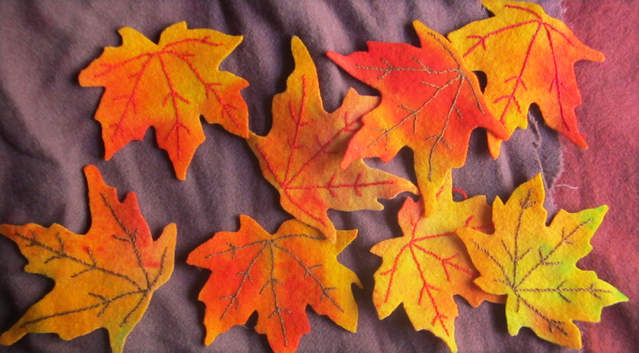
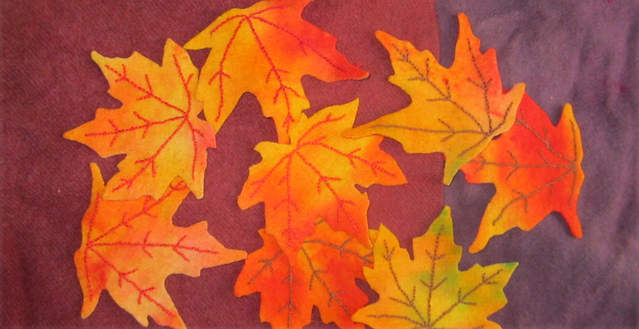
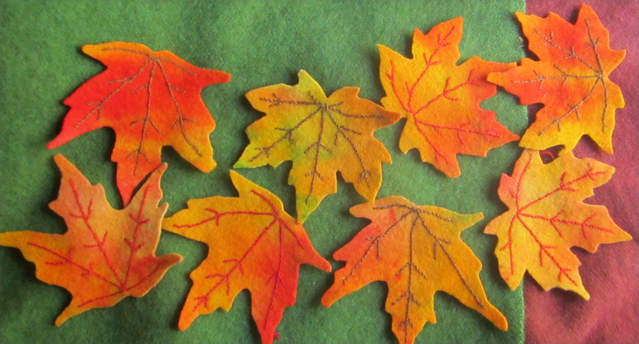
Using the printable autumn leaves pattern (http://childrensart.info/watercolor-leaves-lesson/watercolor-leaf-template.pdf) from our sister website ChildrensArt.Info, I cut out twenty or so maple leave shapes.
I hadn't actually decided on the runner's base shape at this point, so I wanted enough leaves to play with. I also knew I liked the maple leaves enough that any extras wouldn't be wasted?I can use them on hats or scarves.
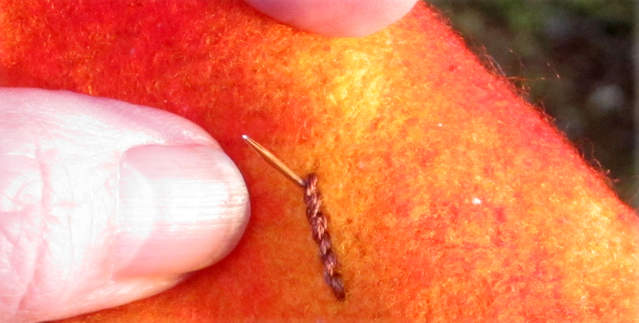
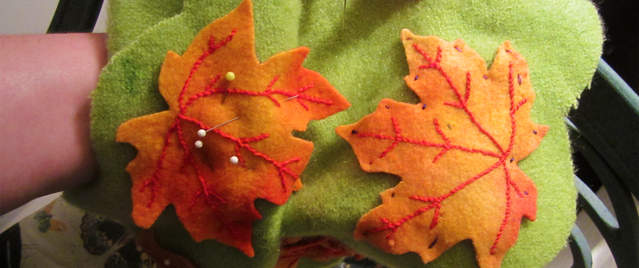
The printable template for the autumn leaves has the leaves' veins sketched in. I used the template as a reference to embroider the veins with a simple chain stitch.
Choosing Colors and Changing My Mind
Originally, I envisioned brightly colored leaves set against a two tiered base of brownish red and purplish brown.
Too drab!
I tried switching the base colors around, but the reds weren't working together happily.
I brought out some felted pieces I had dyed earlier.
Dark green over reddish brown
Dark green over brownish purple
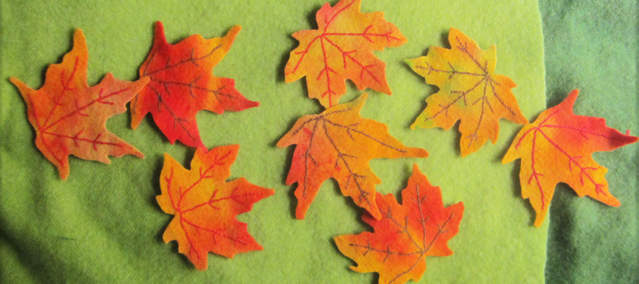
I liked the reddish orange leaves on top of the tiered light green and dark green bases best. I had embroidered some of the leaf veins with green embroidery floss. At this point, I decided not to use the green veined leaves for this particular project.
My calm, earthy-colored project had changed to a bright, energetically colored penny rug.
Penny Rug Base and Placement of the Leaves
I made a scalloped pattern out of paper for the bigger, bottom base.
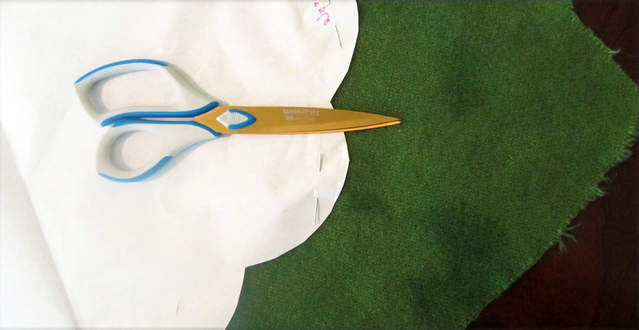
I pinned the paper pattern onto the felt, avoiding some darker spots of color that I noticed near the corner.
I used my heavy duty sharp scissors to cut the felt. I originally bought these for cutting cardboard,which they cut nicely as well, but they can also snip fine detail into felt.
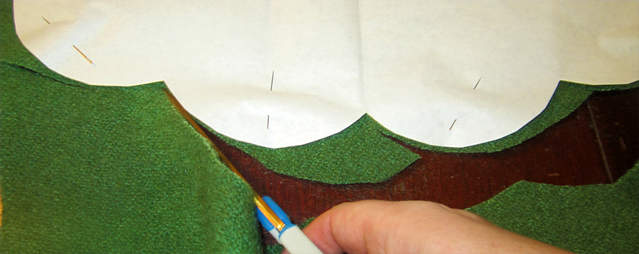
For a scalloped edge, cut from the top of each scallop towards the cleft. Then cut all the scallops in the opposite direction, starting from the top of each scallop cutting toward the cleft.
After I had my dark green base, I trimmed one inch all around from my paper pattern. I used the trimmed down pattern to cut out the light green piece that would fit on top of the dark green piece.
Time for play.
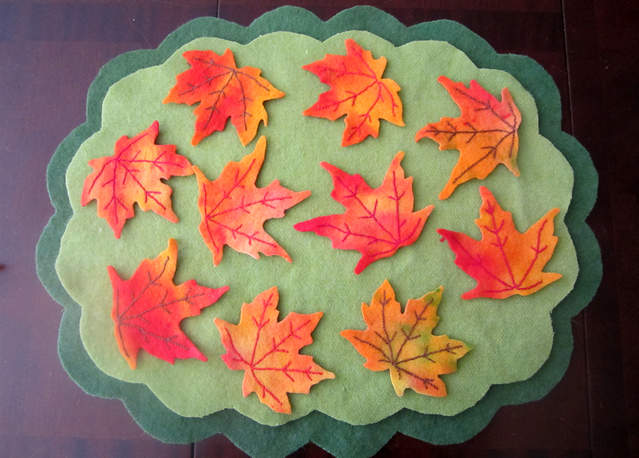
I liked each leaf so much that I tried to fit as many on the base as I could.
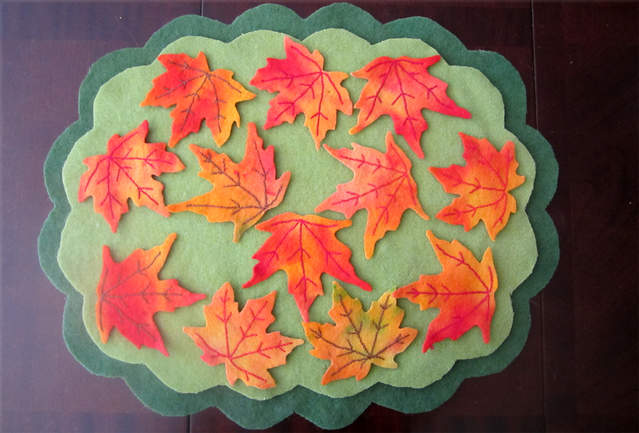
When I placed the leaves here, I was thinking of the first autumn leaves that fall onto the ground while the grass is still fresh green. But there is just too much happening in too little space!
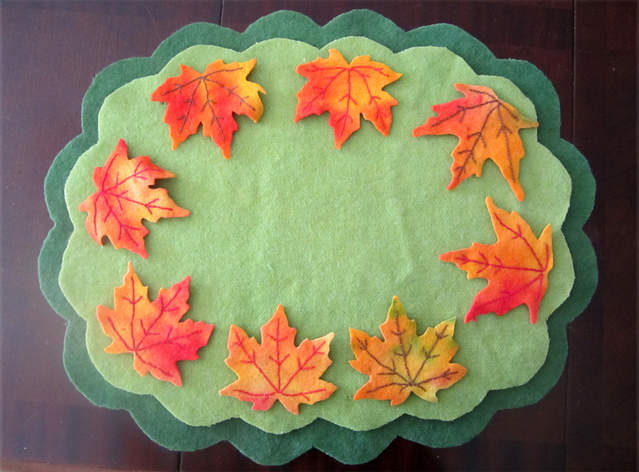
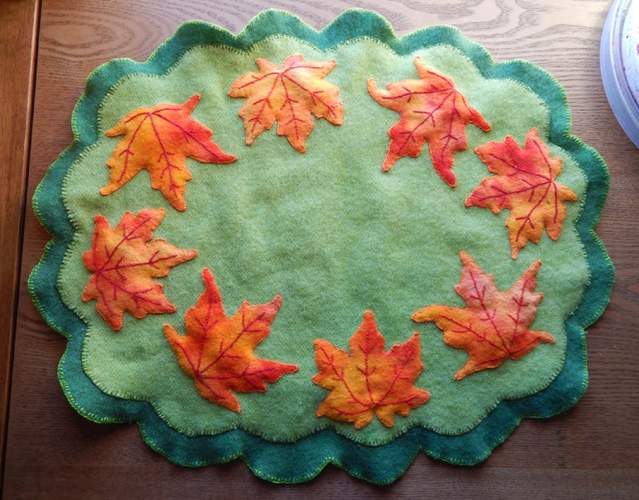
Finally, I opted for a simple circle of leaves around an empty center. The leaves won't compete for attention if I place a bowl or candle in the center.
Finishing the Autumn Leaves Penny Rug
I used long quilters pins to keep leaves in place on the light green base. I knew it would take me a while to blanket stitch around all the leaves. So I tacked them down with black embroidery floss, which was easy to see and pull out as I completed each leaf.
I happened to have some bright orange embroidery floss which matched perfectly as I blanket-stitched around the leaves.
Once the leaves were all stitched securely to the light green piece, I blanket-stitched the light green piece onto the dark green base. I used dark green embroidery floss that showed up nicely against the light green.
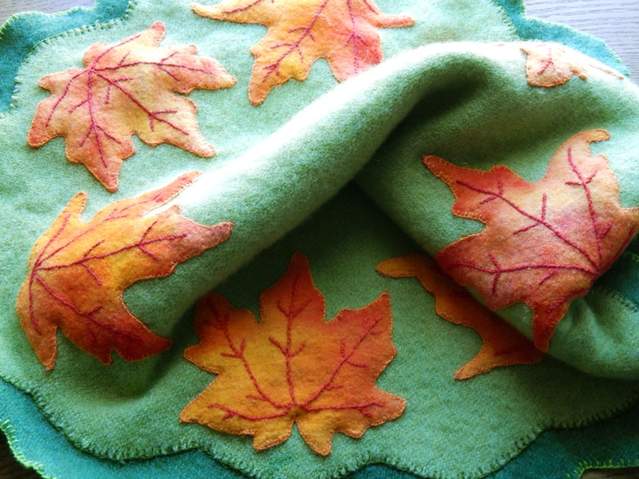
I finished off the edges of the dark green base with a light green embroidery blanket stitch.
(I photographed the penny rug on a cold, cloudy day, which is why the greens look bluer.)